

MySQL is the most popular Open Source SQL database management system and it’s developed by Oracle. Databases are a structured collection of data, such as a contact list or shopping list. MySQL server is designed to handle large amounts of data and allows you to add, access and store them in your hard disk.
Installation
As usual, you can install it using the apt package manager. This time let’s add another package that we will need to get php and MySQL communicate with each other.
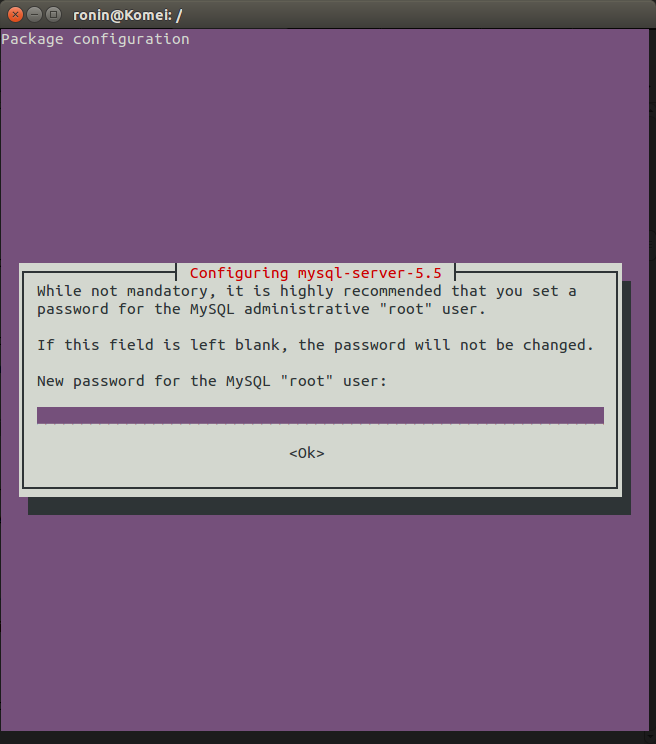
ronin@Komei:/$ sudo apt-get install mysql-server php7.0-mysqlThe packages are quite large, around 100Mb. Once accepted, you will be asked to create a password for the administrative root user. Write down what you insert, you will need it for pretty much every web oriented application.
The installation will continue creating configuration files and installing dependencies. Now, run the shell script to initialize the MySQL data directory and create the system tables. Run the script with
ronin@Komei:/$ sudo mysqld --initializeIn the reference manual of MySQL 5.5 they recommend to improve the security of the installation by setting the root’s password, by removing the anonymous user account, the test database and privileges that permit anyone to access databases with names that start with test_. Just run the script with
ronin@Komei:/$ sudo mysql_secure_installationThe script will ask you a few simple questions.
At this point, your database system has been set up. Let’s test it! You can access to MySQL with:
ronin@Komei:/$ mysql -u root -p **********“Nooo another prompt!!” – “Yes, that’s a quick way to access and check or modify tables. We will install the well-known graphical interface, phpMyAdmin later”
If you just type
ronin@Komei:/$ mysql
mysql ERROR 1045 (28000): Access denied for user 'you'@'localhost' (using password: NO)
ronin@Komei:/$ mysql -u root
ERROR 1045 (28000): Access denied for user 'root'@'localhost' (using password: NO)
The only way not to show your passoword while writing is
ronin@Komei:/$ mysql -u root -p
Enter password: **********
Welcome to the MySQL monitor.  Commands end with ; or \g.
Your MySQL connection id is 50
Server version: 5.5.38-0ubuntu0.14.04.1 (Ubuntu)

Copyright (c) 2000, 2014, Oracle and/or its affiliates. All rights reserved.

Oracle is a registered trademark of Oracle Corporation and/or its
affiliates. Other names may be trademarks of their respective
owners.

Type 'help;' or '\h' for help. Type '\c' to clear the current input statement.
mysql>
Basic commands
Let’s first take a look around. Use the ‘show databases;‘ command to display all databases. The ‘\u‘ command to change or access db.
Ok, we explored the information_schema database and displayed its tables.
Next, create two databases: rovers and humanoids.
mysql> create database rovers;
Query OK, 1 row affected (0.00 sec)
mysql> create database humanoids;
Query OK, 1 row affected (0.00 sec)
Check if the databases have been created successfully with the ‘show databases;’ command.
Create users and grant permissions
If you are used to access with your root account, for security’s sake, it’s better to change your habits. Create two users, usera with password ‘pssa’ and userb with ‘pssb’.
mysql> CREATE USER 'usera'@'localhost' IDENTIFIED BY 'pssa';
Query OK, 0 rows affected (0.00 sec)

mysql> CREATE USER 'userb'@'localhost' IDENTIFIED BY 'pssb';
Query OK, 0 rows affected (0.00 sec)
If you exit and access with your new users, it will be impossible to access any db. You need more power. We will give privileges to usera to access the rovers db and userb to access the other one.
mysql> grant all privileges on rovers.* TO 'usera'@'localhost';
Query OK, 0 rows affected (0.00 sec)

mysql> grant all privileges on humanoid.* TO 'userb'@'localhost';
Query OK, 0 rows affected (0.00 sec)
The syntax for command is:
GRANT [type of permission] ON [database name].[table name] TO ‘[username]’@’localhost’;
Reload the privileges and you’re done.
mysql> flush privileges;
Query OK, 0 rows affected (0.00 sec)
Test your changes
Exit Mysql, log in with ‘usera‘ and try to use the ‘humanoid‘ database and then ‘rovers‘ db
mysql> exit
Bye
ronin@Komei:/$ mysql -uusera -ppssa
Welcome to the MySQL monitor.  Commands end with ; or \g.
Your MySQL connection id is 53
Server version: 5.5.38-0ubuntu0.14.04.1 (Ubuntu)

Copyright (c) 2000, 2014, Oracle and/or its affiliates. All rights reserved.

Oracle is a registered trademark of Oracle Corporation and/or its
affiliates. Other names may be trademarks of their respective
owners.

Type 'help;' or '\h' for help. Type '\c' to clear the current input statement.

mysql> \u humanoid
ERROR 1044 (42000): Access denied for user 'usera'@'localhost' to database 'humanoid'
mysql> \u rovers
Database changed
Get rid of the terminal and install phpMyAdmin
PhpMyAdmin provides a web interface to interact with MySQL. Let’s install it.
ronin@Komei:/$ sudo apt-get install phpmyadminIn order to configure your installation correctly
- Select Apache2 for server selection. Hit space to select the option, then tab to select Ok and finally Enter.
- Press Yes to use dbconfig-common
- Enter your administrative MySQL password
- Choose and confirm a password for phpMyAdmin program
You can reconfigure phpMyAdmin by running
ronin@Komei:/$ sudo dpkg-reconfigure phpmyadminOnce PhpMyAdmin has been correctly installed and configured you can now access control panel in your browser. Just go to http://localhost/phpmyadmin
Finally login with your administrative MySQL credential and use phpMyAdmin with your graphical interface.