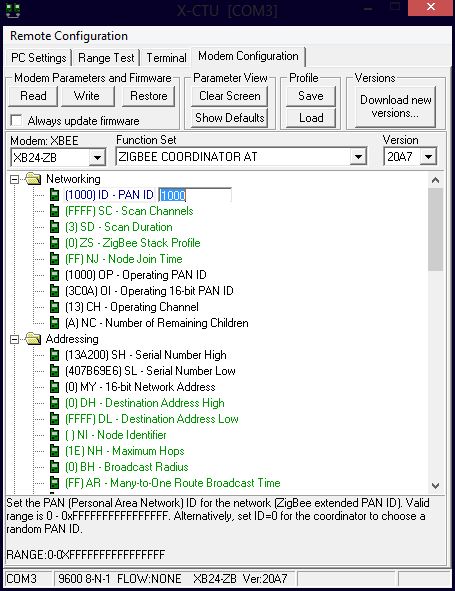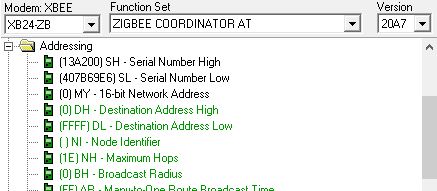

Fist of all we need the XCTU software, to install the FTDI USB Serial driver and a Windows OS. I recommend to program Xbees in a windows environment. Then in order to create a simple Personal Area Network (PAN) we will configure the first module as coordinator and the second as router. Choose which device to use as coordinator and router. Here are the different device types defined in the Zigbee network (Please refer to this link for further informations):
- Coordinator: Start a new personal area network (PAN) by selecting the channel and PAN ID. Allow routers and end devices to join the PAN, transmit and receive RF data transmission and route the data through the mesh network.
- Router: Transmit and receive RF data transmission, and route data packet through the network
- End Device – Cannot assist in routing the data transmission but transmit or receive RF data transmission and intended to be battery powered devices.
Set up the coordinator
- Plug the first Xbee in the USB Explorer board and connect it to the computer. Go to Device Manager and identify the USB port.
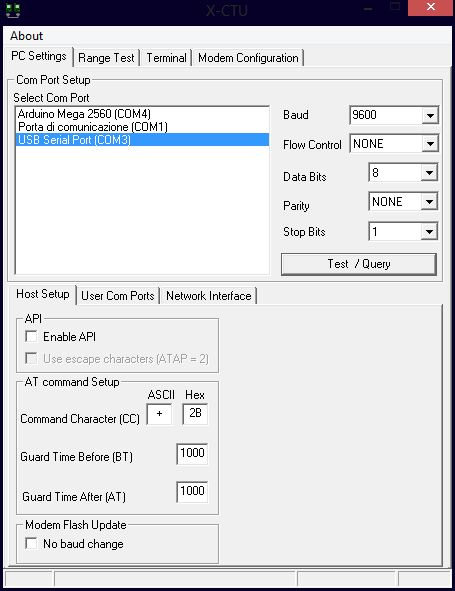
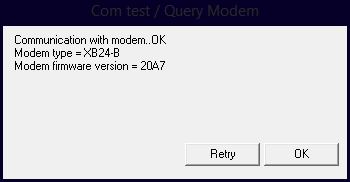
- Open XCTU, select the correct port and click the Test Query button in the “PC Settings” tab. A dialogue box should pop up with informations about your device. Note your Modem type.
Errors?
If you get an error, check your connections, and the connection's parameters. Make sure that baudrate = 9600, Flow Control = None, Data bits = 8, Parity = None and Stop bits = 1. Try with the 'Enable Api' option checked before throwing your xbee away.